Wednesday, December 15, 2010
Consumnes River Preserve
Late December afternoon at the Consumnes River Preserve with the Canon EF 100-400mm lense. Click on the picture below to view a slideshow. When you are done or just wish to quit, click the "X" on the upper right corner of your window.
Tuesday, December 14, 2010
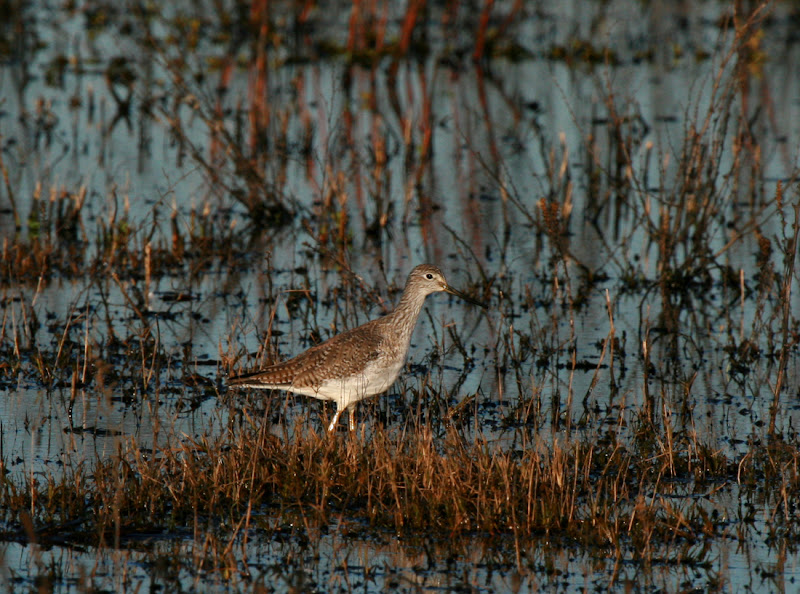
Winter Visitors
This year, I'm seeing a higher number of Snowy Egrets and an occasional Great Blue along the local drainage canals which crisscross the neighborhood. With a borrowed Canon EF 100-400mm lense, below are pictures of some winter visitors. Click on the picture to view a slideshow. When you are done or just wish to quit, click the "X" on the upper right corner of your window.

Tuesday, November 30, 2010
Black Diamond Mines Regional Park
Exploring the Black Diamond Mines Regional Park, part of the East Bay Regional Park District within the Alameda and Contra Costa counties. Overall, the East Bay Regional Park District includes 65 parks spanning more than 100,000 acres with 1,100 miles of trails. With the onset of winter and snow in the mountains, these regional parks which are often too hot during the summer months, are prime areas for wintry day hikes. In the past years, I've been to a number of the East Bay Regional Parks, but this is my first hike within the Black Diamond Mines Regional Park. On the heels of the latest storms, Geno, Dick and I encountered crisp blue skies above soft colored hillsides of golden grass and phenomenal views of the east bay and central valley. Discover more about the Black Diamond Mines Regional Park using a Google search.

Click on the picture to view a slideshow from our trip. When you are done or just wish to quit, click the "X" on the upper right corner of your window.
Click on the picture to view a slideshow from our trip. When you are done or just wish to quit, click the "X" on the upper right corner of your window.
Tuesday, November 23, 2010
Hawaii On My Mind
It's been more two weeks since returning from Oahu and a winter chill is beginning to settle upon Northern California. We had spent two weeks on the Pacific Island with no particular agenda other than to relax and enjoy the scene. Our place was a 10th floor condo above the noisy streets of Waikiki near the busy shops and restaurants a quarter mile from the beach. Our motto while there was to simply act as if we lived there. Some highpoints from our trip include the completion 4 books between us, exploring Oahu with my Bike Friday, strolling the streets of Waikiki on warm evenings (especially on Halloween Night), and of course sampling the great local foods. Speaking of food, in my opinion, the best Ramen in Waikiki can be found at the Tenkaippin at 617 Kapahulu Avenue.
Now, Halloween Night on the streets of Waikiki was a surprise to Kay and I. We had no idea that locals and visitors alike took to the streets in costumes, from the elaborate to the minimal. Don't forget this is the tropics where little clothing is needed. From end to end on the sidewalks of Kalakaua Avenue was an endless parade of costumes and sightseers. People with the most elaborate costumes often attracted a crowd and were trailed by the flash of cameras. And I didn't have my camera! Shoulder to shoulder with the throngs, we spent the evening strolling the sidewalks enjoying the costumes, street performers, and its festive atmosphere.
 Click on the picture to view a slideshow from our trip. When you are done or just wish to quit, click the "X" on the upper right corner of your window.
Now, Halloween Night on the streets of Waikiki was a surprise to Kay and I. We had no idea that locals and visitors alike took to the streets in costumes, from the elaborate to the minimal. Don't forget this is the tropics where little clothing is needed. From end to end on the sidewalks of Kalakaua Avenue was an endless parade of costumes and sightseers. People with the most elaborate costumes often attracted a crowd and were trailed by the flash of cameras. And I didn't have my camera! Shoulder to shoulder with the throngs, we spent the evening strolling the sidewalks enjoying the costumes, street performers, and its festive atmosphere.
Click on the picture to view a slideshow from our trip. When you are done or just wish to quit, click the "X" on the upper right corner of your window.
Sunday, November 21, 2010
More Crocker
On a quiet Friday, the first day of an impending chain of storms, Kay and I venture to the newly renovated Crocker Art Museum. What we found was an active thriving art scene full of energy with a building that is both seamlessly functional and the epitome of the art of design. The amount of art on display was impressive as well as its wonderful exhibitional space. The new architecture appears to frame the historic Victorian, a showcase in itself, and the internal transition between past and present is effortless. The breathtaking open space leads to a maze of corridors and rooms as one wander the arts. If you love art and design, visit the Crocker Art Museum, the envy of any major metropolitan centre. Click on the picture below to open a new window and view my slideshow. When you are done or just wish to quit, click the "X" on the upper right corner of your window.

Wednesday, November 17, 2010
Crocker Art Museum
On Oct 10, 2010, the Crocker Art Museum celebrated the opening of its newly expanded facilities designed by Gwathmey Siegel & Associates Architects. The expansion tripled the size of the museum which opened with great anticipation from local officials, artists and art enthusiast. The event included performances by the Sacramento Youth Jazz Band, Symphony and Choir; Salsa, Indian, Mexican African and Irish dance and music. Car art from the Art Car Fest 2010, provided plenty of fascination outside the museum. Kay and I rode our tandem to the event, but decided to visit the facilities on another day due to the crowds. Click on the picture below to open a new window and view my slideshow. When you are done or just wish to quit, click the "X" on the upper right corner of your window.

Monday, October 11, 2010
Rainlegs for my Cycling Friends

What are Rainlegs? It's an obscure rain product that's available for cyclist. Most cyclist I know haven't heard of them. Even some cycling friends in the UK haven't heard of them and the product comes from Europe, Holland to be more specific. The best way to describe Rainlegs is to say they're like chaps, similar to what cowboys might wear, but for cyclist. They cover the upper front of your legs with waterproof material to keep them dry while riding in the rain. I discovered Rainlegs through the internet via a friend. I've always thought the concept made a lot of sense but never purchased them since I, like most cyclist, avoided riding in the rain. Well, a 6-week self-contained bike tour in the UK changed that. Right or wrong, the UK is known for its rain so I wanted some type of protection. I've used full rain pant in the past and disliked wearing them. They're noisy when cycling, causes overheating, and are difficult to put on and remove. So I decided to give Rainlegs a try.
After receiving them in the mail, the first thing I had to do was to figure out how to put them on. Now, anyone can figure it out after a few minutes but allow me to describe it anyway. There are five fasteners. One for the waist and 2 for each leg; hence five. Also, there is no backside to the Rainlegs. To put them on, first determine which side is the inside. The smooth nylon surface is on the outside which means the waterproof coating is on the inside. Put them on by fastening the waist first, somewhat like putting on an apron. Then each leg can be fastened; one is a clip-on and the lower is velcro. Tighten as needed and you're good to go. Does it look funny? Well maybe, but you'll overlook that after using it in the rain.
So how does the work? After using them on the 6-week bike tour in the UK where it rained on a regular basis, I'm sold. 'Fabulous' would be an appropriate word for describing them. Rainlegs will now be part of my regular gear whenever I bike tour. I may even wear them just walking in the rain. For cycling, they address all the issues I had with full rain pant. Rainlegs are not overly noisy, don't cause overheating, and are easy too put on and remove. Best of all, they work and keep you dry from your knees up to your waist. You'll have to wear your rain jacket if you want to keep the rest of your upper body dry. Ha! During the tour, I rode in the rain with and without them on. I then decided that I preferred having dry legs. It's a comfort issue and I felt warmer when my upper legs were not wet. The only issue I had is that material from the Rainlegs sometimes caught (hooked) on the nose of the saddle when I stood up on the bike. This may only be an issue for me because of my saddle type and/or bike setup; and not an issue for you. Other than that, I'm happy and I'd recommend Rainlegs.
Be safe everyone.
Subscribe to:
Comments (Atom)


